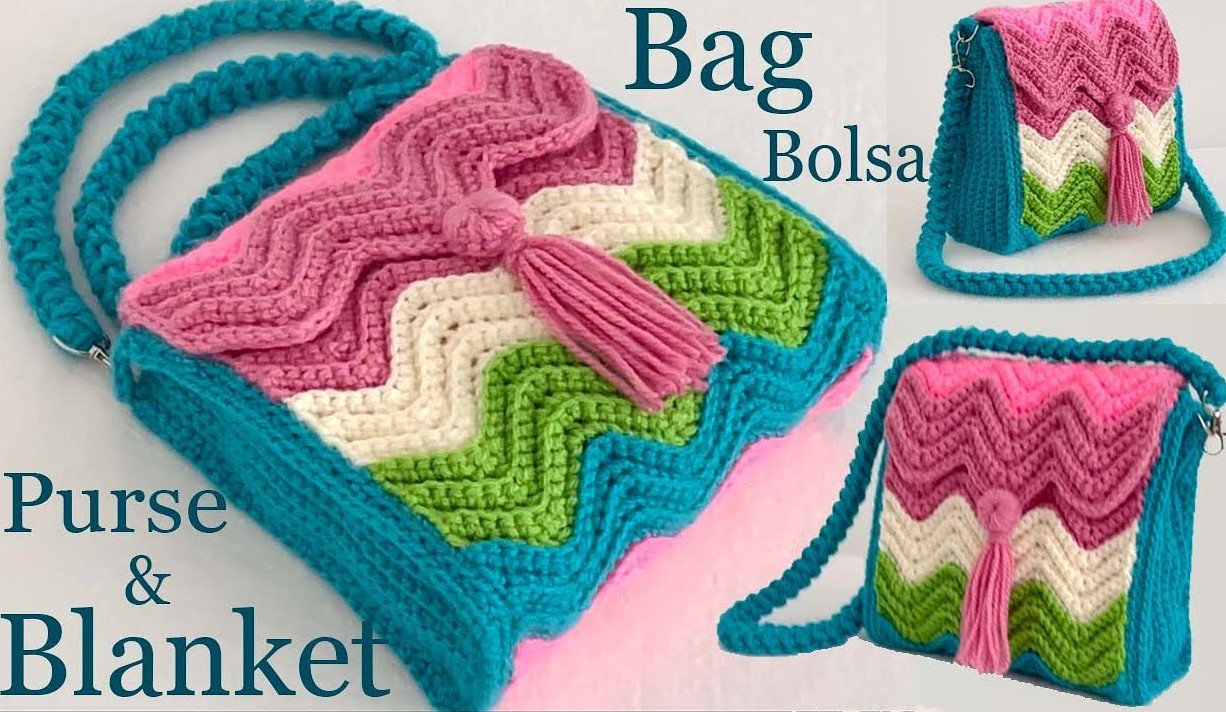
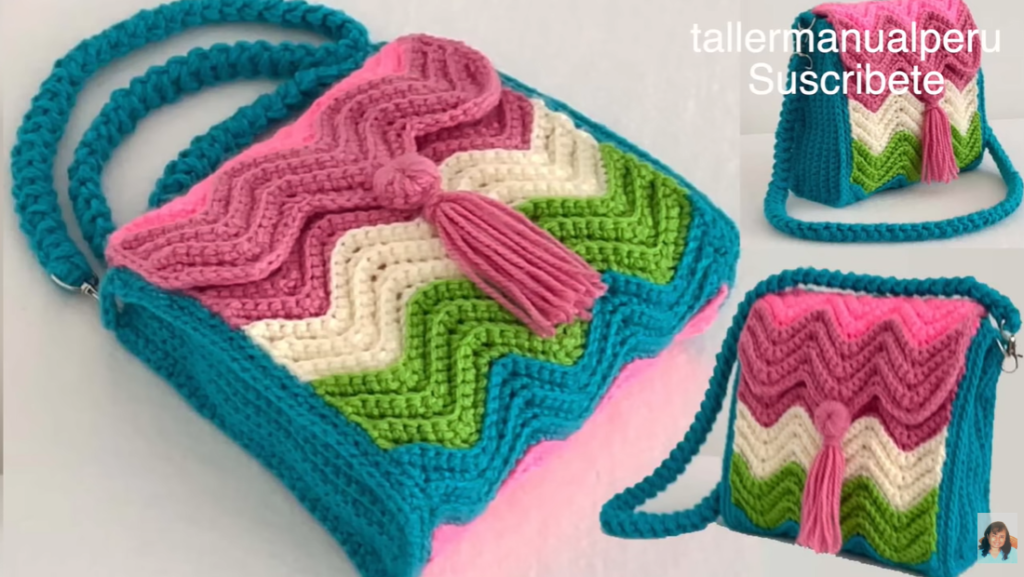
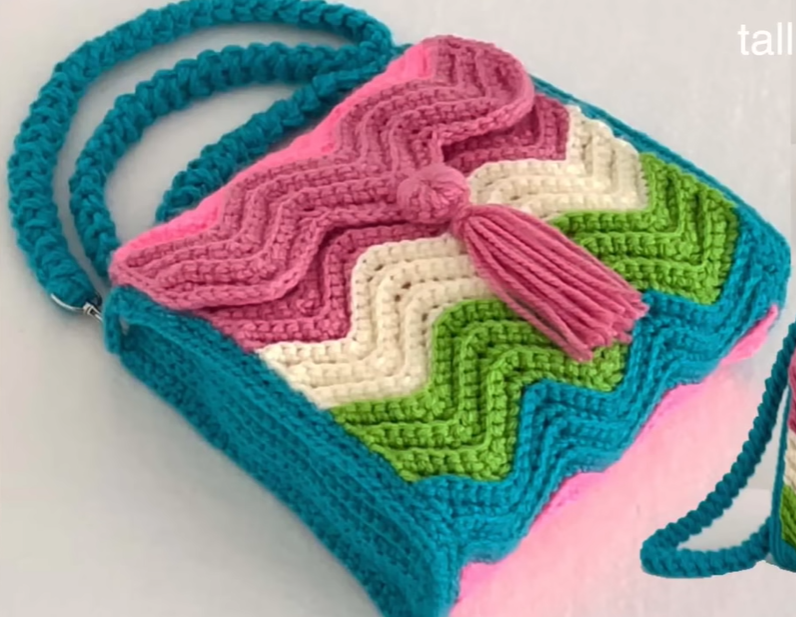
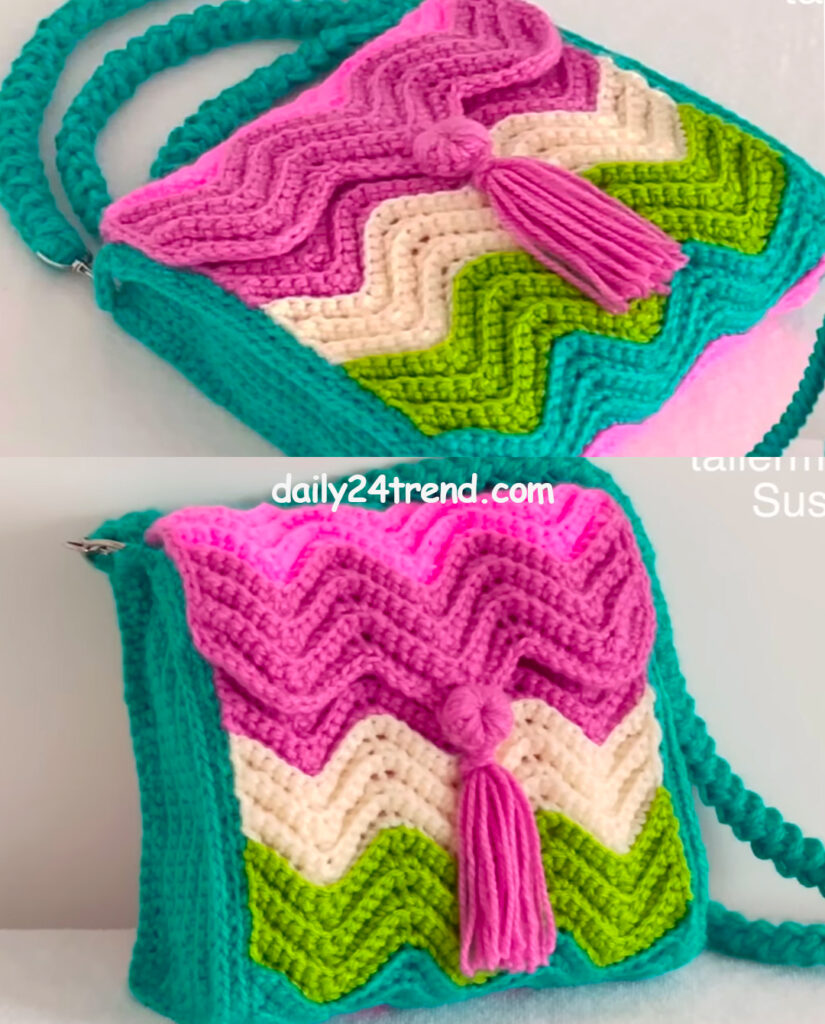
I. Pattern 1
Creating a beautiful crochet bag as a gift is a great way to show off your creativity and thinking. Making a simple crochet bag using rectangles is a great option. Here is a step-by-step guide:
Materials you need:
- Crochet hooks for your yarn
- Heavy weight or bulky yarn in your chosen color
- Scissors
- Yarn needles
- Optional: decorative buttons, beads or other accessories
Instructions:
1. Choose thread and hook:
- Choose soft and strong yarn in your favorite color. Heavy weights or bulky yarns work well for bags.
- Choose a hook size that complements your yarn options.
2. Start with a chain:
- Start by tying the desired number of stitches to the width of your bag. This will be the foundation chain.
- The width will depend on your preferences and the size of the bag you want to create.
3. Single row:
- Starting from the second chain from the hook, sew a single stitch in each chain.
- Turn your work and chain 1.
4. Continue a single row:
- Repeat the same row until your piece reaches the desired length for the bag.
- The length will determine how deep the bag is.
5. Folds and seams:
- When your rectangle is the size you want, fold it in half widthwise and the right side facing each other.
- Use thread needles to sew one side of the bag together with a slipper or whip. Make sure the seams are secure.
6. Handles:
- Decide where you want the handles on the bag. Mark the dots on either side.
- Tie your yarn at a marked spot and create a chain long enough to serve as a handle.
- Skip a few stitches and attach the chain at another marker, creating the first handle.
- Run again on the other side to create a second handle.
7. Finish:
- Weave any loose ends with a cotton needle to ensure a clean look.
- If desired, you can add decorative buttons, beads or other accessories to enhance the beauty of the bag.
Your crochet bag with a rectangular base is complete! This simple design allows you to show off your crochet skills while creating practical and cute gifts. You can customize the bag by choosing the color you like and add your own creativity.
Whether it is used as an everyday bag, a beach bag or for a special occasion, the bag you create will carry the touch of your hand and the emotion behind your gift.
II. Pattern 2
Creating a beautiful crochet bag as a gift is a great idea. Making a simple crochet bag using rectangles is an easy project for beginners. Here are some step-by-step instructions to help you make an easy and beautiful crochet bag:

Materials you need:
- Crochet hook for your yarn
- Heavy weight or bulky yarn in the color you want
- Scissors
- Yarn needles
- Optional: buttons, beads, tassels or other accessories
Instructions:
1. Choose thread and hook:
- Choose soft and strong yarns that are suitable for bags such as cotton or acrylic.
- Choose a hook size that complements your yarn weight to achieve the desired tension and fabric.
2. Rectangular Crochet:
- Start by tying the desired amount of string to create the width of your bag. This will be the short section of the rectangle.
- Make rows of stitches of your choice (such as single stitch, double stitch or double stitch) until you achieve the desired length for the bag. This will be the long side of the rectangle.
- Remember to tie the appropriate number of chains at the beginning of each row to match your chosen string.
3. Folds and seams:
- Fold the rectangle in half, matching the shorter sections to form a fold at the bottom of the bag.
- Use a needle and thread to sew both sides together using a whip or slipper, leaving the top edge open. Be sure to leave a hole large enough to open the bag.
4. Add handles:
- Measure the desired length of the bag handle and chain the appropriate number of stitches for each handle.
- Attach the handles to the inside of the bag on either side using a sliding seam or a single stitch. Make sure they are securely connected.
5. Finish:
- Tie a piece of string and cut it into long tails for weaving.
- Use a cotton needle to weave on any loose part to get a clean finish.
6. Decoration (optional):
- You can add buttons or closures on the top of the bag for added security. Attach it to the front of the bag and create a loop or button on the other side.
- Add beads, tassels or other accessories to enhance the beauty of the bag.
Your rectangular bag is now ready! This simple but beautiful design is diverse and can be customized with yarn colors, sewing patterns and various embellishments. It’s a thoughtful and handmade gift that the recipient will surely appreciate.
Enjoy the process of sewing and creating a special bag to give as a gift!